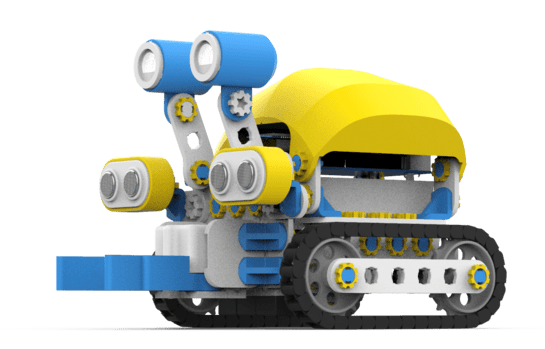
We have the answers
How to check your LEDs.
To check if your LEDs are working properly, program your SkriBot with a code in ‘Show more’.
My SkriBot’s LEDs are red and it’s not responding to any commands.
Your SkriBot has encountered an error. Try restarting it.
How to check your Contrast sensor
To check if your Contrast sensor is working properly, program your SkriBot with a code in ‘Show more’ and follow the instructions there.
Which surfaces work best
The Contrast sensors will work best on a flat surface. Surfaces like a carpet with very uneven area will confuse the sensors and give your program incorrect results.
Your contrast sensors might need calibration to work best on your surface
Select a project and pair with your SkriBot. Then press on your SkriBot’s name in the top right corner and select ‘Calibrate sensors’. Follow the instructions on your device to calibrate the sensors.
How to check your Distance sensor
To check if your Distance sensor is working properly, program your SkriBot with a code in ‘Show more’ and follow the instructions there.
Distance sensor specifications
The Distance sensor works best when the battery is fully charged (Green LED on the SkriBrain). The optimal distance it can read is between 5cm and 100cm. Any readout below or above these values will lead to incorrect behaviour of the robot.
Misusing the gripper
Don’t open and close the gripper by hand, especially while it’s powered on. This behaviour can lead to damaging the gripper! You should also avoid keeping the gripper in closed position for too long – 3+ minutes.
Proper startup routine
When you power on your SkriBot, the gripper should be open and in bottom position (see ‘Show more’).
How to check your Gripper
To check if your Gripper is working properly, program your Skribot with a code in ‘Show more’ and follow the instructions there.
How to check your Motors
To check if your Motors are working properly, program your SkriBot with a code in ‘Show more’ and follow the instructions there.
Loose connector and broken cables
Check if the connector on the cable isn’t loose and that the cables aren’t broken.
Alignment of front and back wheels
Make sure the wheels on one side are aligned with each other. See the SkriBot Set Assembly Manual for reference.
Tracks arrangement
Make sure all of the track links are connected to each other the same way.
Free rotation of the front wheels
Take the tracks off the wheels and check if the front wheels can spin freely. If not make sure the front wheel assembly is built properly. See the SkriBot Set Assembly Manual for reference.
SkriBot doesn’t drive in a straight line
You can calibrate the motors of your SkriBot. Select a project and pair with your Skribot. Then press on your SkriBot’s name in the top right corner and select ‘Calibrate motors’. If your Skribot drives off to the right, move the slider to the left and press TEST. Move the slider to the right if your SkiBot drives off to the left. You can also invert the wheel’s spin direction.
The wheels are spinning in the wrong direction
Select a project and pair with your SkriBot. Then press on your SkriBot’s name in the top right corner and select ‘Calibrate motors’. You can select ‘Invert right’ or ‘Invert left’ to change your motor’s directions.
Keep you battery charged
All of the sensors on your SkriBot work best when the battery is fully charged. It is indicated with green LED on the SkriBrain.
LED status colours
LED colours tell you the state of the battery. Green – battery charged, Yellow – you should charge the battery, Red – battery is at critical level and you should charge it as soon as possible to avoid damaging it.
How to connect the charger and LED on the charger
The charger has two states represented by an LED. Green – the battery is fully charged, Red – the battery is still charging. If you need help on how to connect the battery and the charger check the picture in ‘Show more’.
Regular startup routine
The LED on the Skribrain should blink twice when you turn it on. This signalizes a proper startup procedure.
Pairing your phone to a Skribot
To connect your mobile device to your SkriBot make sure the device is very close to the bluetooth module on the SkriBrain. Check the picture in ‘Show more’.
Bluetooth support
The SkriBots app works with Bluetooth 4.0 or higher.
Change your SkriBot’s name
You can change your SkriBot’s name in the project panel. Just select a project, connect your SkriBot and select it’s name at the top of the screen. Next time you connect to this SkriBot, it will introduce itself with a new name.
Connection status
Your SkriBot’s eyes will blink with white LEDs when it’s ready to be connected to an app. Continuous LED light will tell you it’s already connected and ready to be programmed.
SkriBot doesn’t pair automatically with already connected project
Tap the robot’s name and then select ‘DISCONNECT AND FORGET’ option and carry out the pairing procedure from scratch. If you still cannot connect to your SkriBot, restart the application and robot.
